Painting
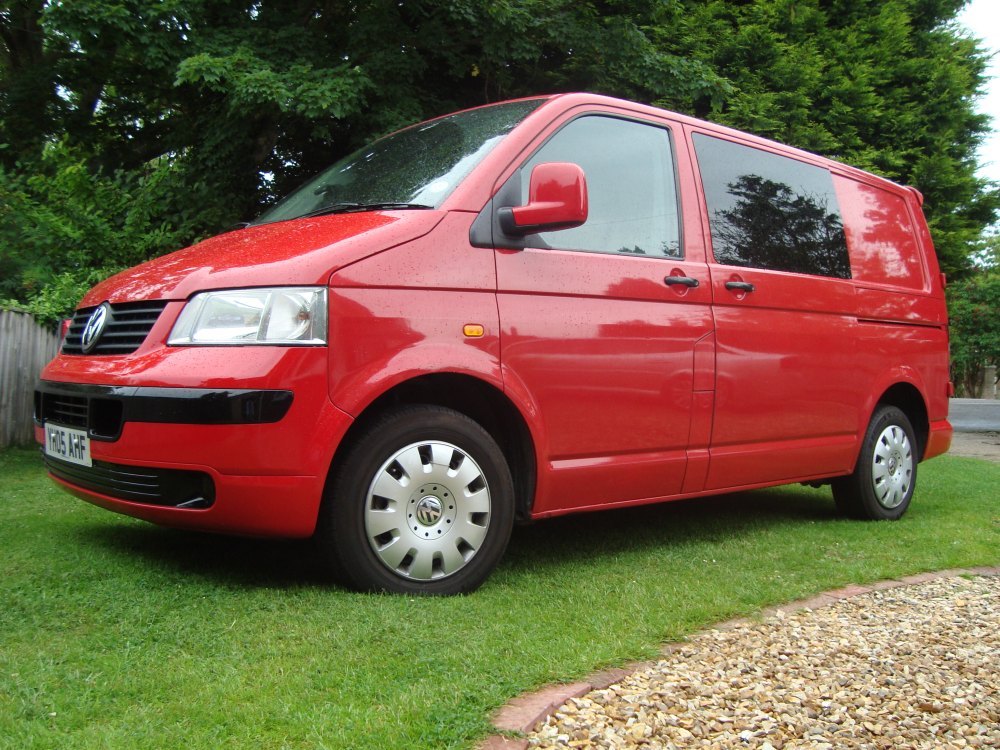
Colour Coding the van
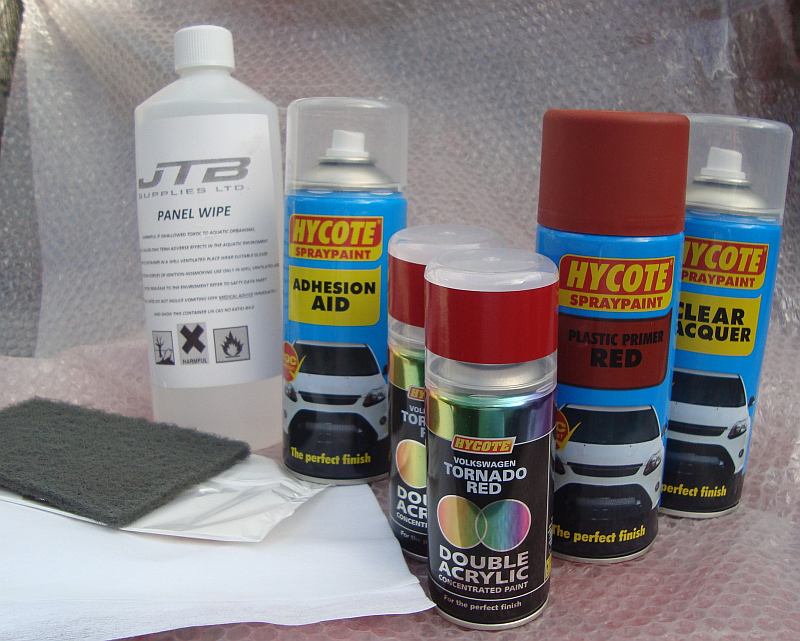
What you need
* Panel wipe
* bumper filler or body filler
* suitable application tool (u get a plastic card with the filler)
* Orbital Sander
* Wet n dry - 5-6x120, 4x240, 2x400, 2x600, 1x1000
* Plastic primer x 3-5 cans
* Primer filler x 2-3 cans
* Top coat x 5-7 cans depending on job and colour.
* Lacquer x 3-4 cans depending on coats.
* Tack cloths
* Dust mask
* Paint mask
* Blow Lamp / Torch
Painting
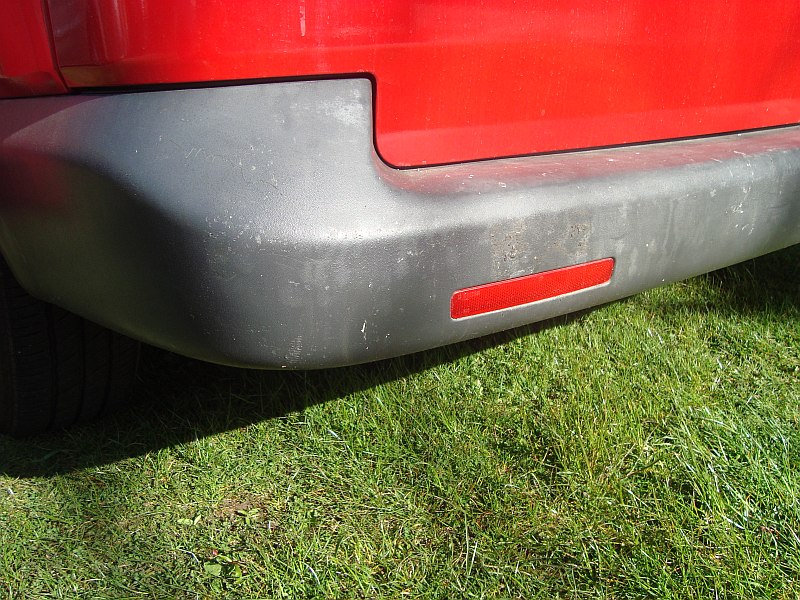
1st thing is to degrease the bumper totally - many have had that silicone back to black sprayed on them and that repells everything inc body filler. Use methalated spirit or panel wipe to remove it - do this several times.
Then you need to sand it smooth, start with 320 grit wet n dry and just keep at it. You'll find it will go all 'furry', don't worry because you need to work with finer grades of paper up to about 800, most of the fur will go and the last few bits will vanish once you flame it. It really takes ages to sand but it will eventually go smooth.

-
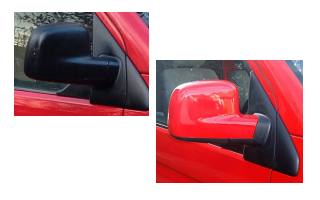
 The old scratched black plastic mirrors, these were washed in hot soapy water and rinsed, sanded and de-greased, preped with panel wipe.
-
 Same mirrors colour coded.
3 coats of red plastic primer, 3 coats of Hycote Acrylic Spray and one coat of clear.
Between each stage they were wiped with a grey scotch bright pad and panel wipe.
Same mirrors colour coded.
3 coats of red plastic primer, 3 coats of Hycote Acrylic Spray and one coat of clear.
Between each stage they were wiped with a grey scotch bright pad and panel wipe.
Next, mix some filler - do the filling in sections and dont mix too much in one go, it'll go off in 3-5 mins depending on temp and mixture - mix it in the portions described on the pack. You can put a little less hardner in than required, this will give you a longer work time, don't put too little though or it wont go off. Don't use the filler when it starts to turn rubbery, it wont stick and is useless.
Smooth the filler onto the area to be smoothed - if smoothing a detail line for example, get a wallpaper scraper or spatula and smooth the filler into the gap from the top down, pushing into the gap a little. Overlap the gap from above alightly onto the bumper. Dont worry if it doesnt fill the gap totally - you need to build it up in layers to be proud of the surface anyway. Once youve gone along the entire bumper gap, mix more filler and start again. The second pass of filler should stand proud a little from the bumper (if not you may need a third pass) - when spreading it go diagonally top down a little and make sure theres filler either side of the gap so you can feather the join line. Fill in any corner damage etc also at this stage.
Once it starts to cure, you can cut away any excess or obvious big bits. personally Id leave it to fully harden - gives you a more secure fix - just takes longer to sand.
Once fully cured (check side of tin depends on the filler youre using) - you can smooth back. Start off with 120 wet n dry (dry) and work across the line - dont stay in one place too long - keep the sander moving. If you buy standard sheets of wet n dry and get a rectangle standard orbital sander, by folding the paper properly you will be able to get 3 sander areas from one sheet.
WEAR A MASK! It'll get v dusty quickly.
You need to get the line into a rough shape - it will take time and depending on how proud the filler was from the bumper you will start to remove the excess filler so the bumper egde above and below the gap start to appear. These are your guide lines. When it gets close to where the gap used to be, switch to a finer paper - 240 for example. You now need to shape or smooth the filler so its flush with the rest of the bumper. Watch the corners. Finally use 400 paper to smooth it and give a basic finish.
Once youve got the filled areas smooth, you need to key it with plastic primer. You need to use plastic primer otherwise it'll crack. This will also show up any "fault lines" in your sanding which will also show up in the finished paint. If fault lines appear (areas that are still visible from the plastic bumper to the edge of the filler, scratch/sanding marks etc) you need to smooth it down further (use finer paper for scratches or 240/400 for lines). You could if small scratches use filler primer - see below for that.
I guess youre not getting a body shop to respray it (if so let them smooth the bumper - its much easier) - which means youre probably respraying the bumper with spray cans (unless you have access to a compressor). Any "fur" (from sanding a bobbly bumper) will stand up and freeze when sprayed with plastic primer. Simply rub it down gently when the paints dry (12 hours min) and then respray that area again. need about 2-3 coats. IF YOU HAVE SCRATCHES OR FINE FAULTS DONT EXCESSIVELY SPRAY MORE PAINT USING PLASTIC PRIMER - SEE BELOW FOR FILLER PRIMER INSTEAD
Filler primer should/could be used to conceal any fine scratches or imperfections shown up by the plastic primer. Deep holes must be filled with bumper/body filler. Filler Primer is orangey yellow and is used to fill small imperfections. Its thicker than normal paint and very useful for removing scratches or edges. DONT spray too much in one area - it wont dry properly. Build it up in thin layers. You dont need to do the whole bumper, just target the specific fault areas. No need to reprime as filler primer is primer as its name suggests,
Once fully cured (about 24 hours) smooth back by hand using 600 wet n dry (dry) - dont get it wet becuase primer absorbs water which will damage your top coat. Check smoothness with finger ends regularly. Donrt overwork. Just take the roughness away. Wipee down with dry cloth. leave the primer to fully cure for a further 5-7 days in a warm area. This will ensure a solid strong working area - however I've applied a top coat after 48 hours and its been fine. Its your choice though!
after cure time, remove all dust (from inside bumper also) and degrease ready to be sprayed.
If using cans, you MUST use lacquer otherwise the stone chips will totally knacker the surface of the paint. Even if the can says no lacquer required use lacquer - its an invisible barrier that stops the paint chipping and the undercoat showing through. My old bumper was red, orange filler primer underneath it - didnt lacquer - after 12 months the front looked really bad - looked like it had been sand blasted!
To spray the bumper, first make sure surface is really smooth and greese free. Keep silicone based items away from it (including WD40 type sprays) - they'll feck the paint job. Place it face up on a work bench or similar so you can walk around it freely and can also see under it (along the wheel arch edges for example)
Get enough cans to spray it the colour needed You'll need 3 coats so I'd say about 6-7 cans (perhaps) - the big ones that is. You can always take them back if not used.
Shake cans then put a couple of cans in a bucket of hot (not boiling) water. this loosens the paint and makes it easier to spray (bigger pressure) - it sort of thins it down making it mix better too.
WEAR SPRAY MASK!
Dry can fully (especially round top) - shake again, then spray the bumper. keep the can moving in a smooth motion and about 10-15cm from the bumper - the can should be horizontal and angle should follow contours of the bumper - go up and down first - working along the bumper. Shake can regularly as you go. Next spray line should slightly overlap the previous one. Once you get to the other side, go back and fill in the small nooks and crannies with "light dustings" of paint. Dont worry if the colour isnt solid - its the first coat - it wont be.
Leave for between 5-10 mins to "flash dry" (see can for details) - dont be tempted to spray more until its flashed otherwise it'll go manky!
If the can isnt spraying good or is coming to the end of its life, get another one - dont force the can - it'll spatter and make a mess!
Next layer spray as 1st layer. Aim to get total coverage though
Allow to flash
3rd layer repeat
Allow to flash.
If you need another coat or need to toach up areas repeat process above. Just remember dont spray too much paint in one area.. Better several thin layers than one long dribbly mess.
If you do get runs, stop, allow to cure (24 hours) smooth back to remove the run and then respray to conceal. Dont try and spray the run out - this makes a mess and only pros are successful.
JUST TAKE YOUR TIME.
You'll need to leave it to cure for 24 hours in a warm area to allow to set. Then check it for imperfections (runs, blisters, bugs etc). Dont worry if it feels rough to the touch because ther lacquer will smooth this down. You need to look for paint faults, areas like runs, blotches, milkiness (didnt let flash) or other nasty paint faults. If you have a bug or fly on the bumper, carefully remove it by gently smoothing the bumper with wet 1000 grit wet n dry (see further in the paragraph). If its obvious and glaring, you'll need to sand back and respray another top coat. You can if you wish smooth the final coat (good for white, yellows or small surfece "nibs" etc) - use 1000 wet n dry (wet) and use warm water/soap to smooth flat. Dont be vigorous - you only want to flatten it. Watch corners and edges too. Wipe dry.
You then need to let it fully cure for at least 5-7 days before applying the lacquer. However its uup to you. Give it at least 48 hours though in warm area.
Lacquer is applied the same as top coat but be very careful. You cant see lacquer - its clear and its thinner than paint so runs easily. Keep can moving and allow to properly flash. Make sure the surface is clean, degreased and dry. Apply at least 3 coats - the more the better.
This also needs to fully harden and I recommend you dont use the bumper until it has done - lacquers soft until fully cured and is easily marked.
Dont worry about small imperfections (like bugs) as they can be buffed out once cured.
Once fully cured, you need to buff up the lacquer to give a deep shine. This can be tricky as lacquer can "burn" (melts). Use a polishing "mop" (like a grinder with a big soft pad on the end - dont use a grinder though!!!) or for the home buffer, try and drill on a medium speed with a lambs wool bonnet attachment (available from halfords etc).
DONT BUFF UNLESS FULLY CURED - IT WILL DAMAGE THE LACQUER.
You'll need some buffing cream - a non abrasive one like G3 buffing compound is good - its a cream. Apply a bit along with a small amount of tcut and gently work an area in circular motions. You only need to get it really smooth. Keep the "mop" moving AND DONT PRESS HARD. Watch corners too. Small areas like grills or vents do by hand. A mop is only really for flat areas. The mk1 bumper is pretty flat anyway - just watch the corners and the point in the middle. Buff for about a minute and them wipe the area by hand. Feel the difference and the shine!
Once buffed and youve buffed the nooks and crannies, you can seal the work with Autoglym Super resin polish. This will help protect the finish.
And thats it. Quite alot but not that much on the grand scheme of things.